


How to Make Candy and Jello in Silicone Molds: Easy Step-by-Step Guide
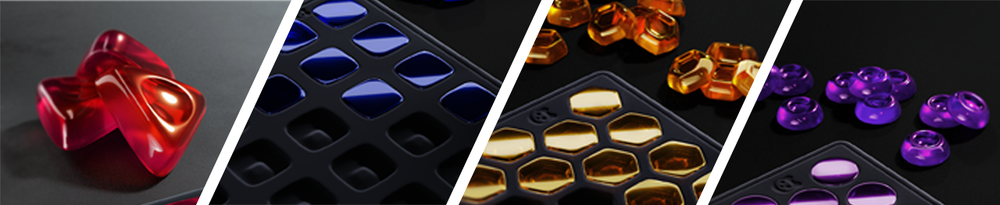
Silicone molds are a game-changer when it comes to making homemade treats. Whether you’re crafting colorful jello shapes for a party or whipping up sweet hard candy, silicone molds make the process easy, fun, and creative. In this guide, we’ll walk you through the step-by-step process for making both candy and jello in silicone molds, along with tips, tricks, and answers to common questions to ensure your treats turn out perfectly every time.
What You’ll Need: Materials & Tools
For Jello:
-
Flavored gelatin (your favorite brand and flavor)
-
Boiling water
-
Cold water
Optional: A little extra sugar for added sweetness
For Candy:
-
Granulated sugar
-
Light corn syrup
-
Water
-
Food coloring
-
Flavor extracts (like vanilla, peppermint, or fruit flavors)
Optional: Citric acid for a tangy kick or salt for balance
Essential Tools:
-
Silicone molds (clean and dry)
-
Mixing bowls
-
Measuring cups and spoons
-
Whisk or spoon
-
Funnel (for precise pouring)
-
Saucepan (for candy-making)
-
Refrigerator (for setting)
Step-by-Step Guide: Making Jello and Candy in Silicone Molds
Step 1: Prepare Your Mixture

For Jello:
-
Dissolve one packet of flavored gelatin in 2 cups of boiling water. Stir thoroughly until the powder is completely dissolved—no grainy bits allowed!
-
Add the recommended amount of cold water (usually 1–2 cups, depending on the brand) and mix well.
Optional: Add a teaspoon of sugar for extra sweetness.
Pro Tip: Want to make layered jello? Divide your mixture into separate bowls and add food coloring to create different layers.
For Candy:
In a saucepan, combine:
-
2 cups of granulated sugar
-
2/3 cup of light corn syrup
-
1 cup of water
-
Heat the mixture over medium heat, stirring occasionally, until it reaches the desired temperature:
-
250°F for softer candy (like jello candy)
-
300°F for hard candy
Pro Tip: Use a candy thermometer to monitor the temperature—it’s your best friend for this step.
Step 2: Add Color and Flavor

For Jello:
Your jello mixture is already flavored, but you can add a few drops of food coloring to make it more vibrant.
For Candy:
Once the candy mixture reaches the right temperature, remove it from the heat and quickly stir in your food coloring and flavor extracts. Be careful—it’s hot! A few drops of food coloring and a teaspoon of extract should do the trick, but feel free to adjust to your taste.
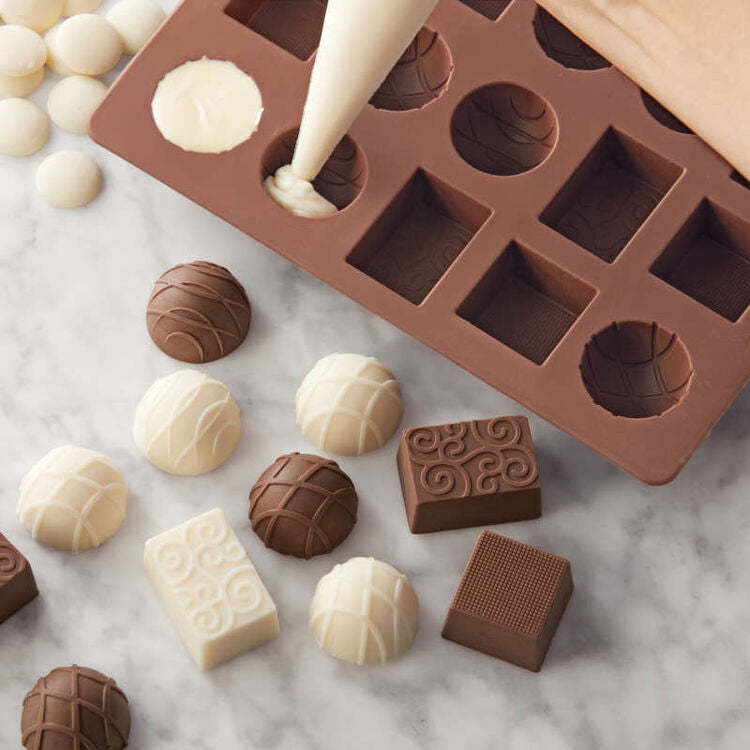
Step 3: Pour the Mixture into Silicone Molds

Lightly grease your silicone molds with a tiny bit of oil to make unmolding even easier.
Carefully pour the jello or candy mixture into the molds. A funnel can help you avoid spills, especially if you’re working with small or intricate shapes. For layered jello, pour the first layer and let it set in the fridge for about 30 minutes before adding the next layer.
Pro Tip for Candy: Work quickly but cautiously, as the candy mixture will start to cool and harden.
Step 4: Set and Chill

For Jello:
Place the filled molds in the refrigerator and let them chill for at least 4 hours (or until completely firm).
For Candy:
Let the candy sit at room temperature for about 30 minutes, then transfer the molds to the fridge for 2–4 hours to fully set.
Step 5: Unmold and Enjoy

Once your jello or candy is fully set, gently pop them out of the silicone molds. For jello, you can use your fingers to carefully loosen the edges, or dip the bottom of the mold in warm water for a few seconds to help release the shapes.
Troubleshooting & Expert Tips
| Issue | Solution |
|---|---|
| Not Setting Properly? | Double-check your gelatin-to-water ratio and make sure the mixture chilled long enough. |
| Layering Issues? | Let each layer set completely before adding the next to avoid mixing. |
| Sticking to the Mold? | Lightly grease the molds with a neutral oil before pouring in the jello mixture. |
| Sticky Candy? | Make sure your molds are lightly greased, and allow the candy to cool completely before unmolding. |
| Crystallized Mixture? | Stir gently and avoid overmixing while heating to prevent sugar crystals from forming. |
Cleaning Silicone Molds:
Wash molds with warm, soapy water and a soft sponge. Avoid abrasive tools that could damage the surface.
Silicone molds are dishwasher-safe, but handwashing can help them last longer.
FAQs
Do I need to grease silicone molds for jello?
It’s not always necessary, but lightly greasing the molds with a neutral oil can make it easier to release the jello without breaking.
How do I keep jello from sticking to the mold?
Grease the molds lightly with oil, or dip the bottom of the mold in warm water for a few seconds before unmolding.
What material is used for jello molds?
Jello molds are typically made from food-grade silicone, which is flexible, non-stick, and safe for both hot and cold applications.
How do you make candy in molds?
Follow the steps above to prepare your candy mixture, pour it into lightly greased silicone molds, and let it set completely before unmolding.
Do you use less water when making a jello mold?
Yes, if you want firmer jello (like jigglers), reduce the amount of water. For example, use 1 cup of boiling water and 1 cup of cold water per packet of gelatin.
How long does it take for jello to set in molds?
Jello typically takes about 4 hours to set completely in the refrigerator.
How do I use my silicone mold for jello?
Simply pour the prepared jello mixture into the mold, refrigerate until set, and gently pop the jello out when ready.
Can you put jello in silicone molds?
Absolutely! Silicone molds are perfect for jello because they’re flexible and non-stick, making it easy to release the shapes.
How do you keep jello from sticking to silicone molds?
Lightly grease the molds with a neutral oil before pouring in the jello mixture.
Can you make candy in silicone molds?
Yes! Silicone molds are great for candy-making because they can handle high temperatures and allow for easy release.
How do you get jello out of a silicone mold without breaking it?
Gently loosen the edges with your fingers, or dip the bottom of the mold in warm water for a few seconds to help release the jello.
Ready to Get Creative?
Making candy and jello in silicone molds is not only easy but also a ton of fun. Whether you’re crafting treats for a party, a holiday, or just because, the possibilities are endless. So grab your molds, gather your ingredients, and let your imagination run wild!
We’d love to see your creations—share your photos and tips with us on social media or in the comments below. Happy molding!